This post is automatically translated with LLM. The translation content has NOT been reviewed and may contain errors.
DN42, short for Decentralized Network 42, is a large-scale VPN network. Unlike traditional VPNs, DN42 utilizes technologies commonly deployed on internet backbones (such as BGP), making it an excellent simulation of a real-world network environment.
In a previous article, I joined the DN42 network, registered my own domain in another article, and set up my own DNS server. Later, in this article, I configured IPv4 reverse DNS. At that time, due to some outdated information on the DN42 Wiki, I mistakenly believed IPv6 reverse DNS couldn't be configured. However, I've since confirmed it's possible through experimentation.
Since the setup process is largely similar, this article will share significant overlap (copy-pasted content) with the earlier IPv4 guide.
Setting Up DNS Servers for the IP Range
The first step is to delegate reverse DNS resolution for all your IP ranges to your own DNS servers. My servers are ns[1-2].lantian.dn42, and both can be specified.
In the IPv4 article, I reused existing settings. But because my IPv6 DNS configuration had issues, I had to submit a Pull Request to update the IPv6 DNS servers, while also updating the IPv4 entries.
After cloning the DN42 data repository, add these lines to your IP range file:
nserver:            ns1.lantian.dn42
nserver:            ns2.lantian.dn42
The entire file should look like this:
inet6num:           fdbc:f9dc:67ad:0000:0000:0000:0000:0000 - fdbc:f9dc:67ad:ffff:ffff:ffff:ffff:ffff
netname:            LANTIAN-IPV6
descr:              Peer with me at dn42@lantian.pub
country:            CN
admin-c:            LANTIAN-DN42
tech-c:             LANTIAN-DN42
mnt-by:             LANTIAN-MNT
nserver:            ns1.lantian.dn42
nserver:            ns2.lantian.dn42
status:             ASSIGNED
cidr:               fdbc:f9dc:67ad::/48
source:             DN42
Next, git add, git commit, submit a Pull Request, and wait for both the merge and recursive DNS propagation.
Setting Up PowerDNS
While waiting, you can prepare the DNS server. Following this article, we assume you already have a PowerDNS server. Reverse IP resolution uses a special domain format.
Since IPv6 provides abundant addresses (everyone gets a /48 block in DN42), there's no need for subnet suffixes like "/29" in IPv4. The special domain format for IPv6 is [reversed IP].ip6.arpa. For example, my fdbc:f9dc:67ad::/48 corresponds to d.a.7.6.c.d.9.f.c.b.d.f.ip6.arpa.
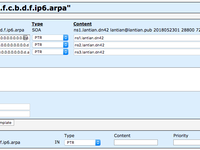
Add this domain to PowerDNS as shown:
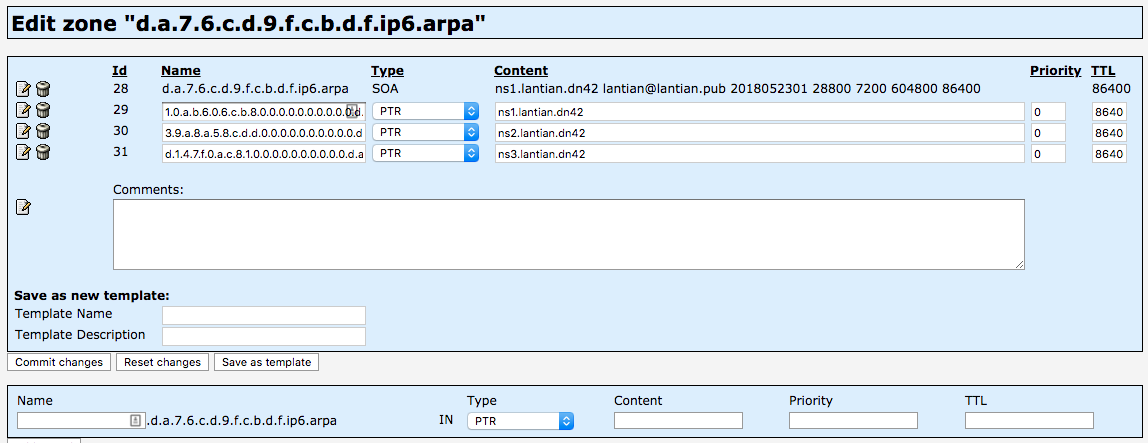
Next, create PTR records for each IP. For instance, the record for fdbc:f9dc:67ad::8b:c606:ba01 would be 1.0.a.b.6.0.6.c.b.8.0.0.0.0.0.0.0.0.0.0.d.a.7.6.c.d.9.f.c.b.d.f.ip6.arpa, configured as:

Manual conversion is error-prone (easy to miss zeros). A shortcut is to run dig -x fdbc:f9dc:67ad::8b:c606:ba01 on Linux/Mac, which outputs:

The QUESTION SECTION displays the PTR record name for the IPv6 address:
;; QUESTION SECTION:
;1.0.a.b.6.0.6.c.b.8.0.0.0.0.0.0.0.0.0.0.d.a.7.6.c.d.9.f.c.b.d.f.ip6.arpa. IN PTR
In this case: 1.0.a.b.6.0.6.c.b.8.0.0.0.0.0.0.0.0.0.0.d.a.7.6.c.d.9.f.c.b.d.f.ip6.arpa.
After DN42's recursive DNS propagates, verify using dig -x [IP] @172.23.0.53.