
This post is automatically translated with LLM. The translation content has NOT been reviewed and may contain errors.
Preface
Achieving intercommunication between containers on multiple Docker servers is a challenging problem. If you build your own overlay network, you need to set up services like etcd on one server. But if the server hosting etcd crashes, the entire network goes down. The cheap VPS I use occasionally experiences network interruptions, and I often accidentally crash servers myself, so this approach isn't feasible for me.
Docker also has other commercial overlay networking solutions like Weave, but for individual users, these solutions are too expensive (I'm just experimenting for fun), so they're not considered either.
In these network architectures, central servers like etcd or Weave record which server each container is on and its internal IP, allowing DNS resolution to any container. For example, if I set up containers named lantian-nginx and lantian-phpfpm, I can directly use lantian-phpfpm:[port] in the nginx configuration file.
But maybe I can sacrifice this feature? I don't have many containers, and only a few MariaDB instances need cross-server connections for master-slave database replication. Manually specifying IPs isn't too troublesome.
Then I can use traditional VPN solutions for intercommunication.
Another problem arises: Since my servers are unstable, I don't want one server crashing to take down the entire network. So solutions like OpenVPN that require a central VPN server are out. P2P VPNs like Tinc meet my requirements, but I frequently add/remove servers—do I really need to modify configurations on each machine every time?
For a centrally managed P2P VPN, I could use LogMeIn Hamachi. This free software connects to LogMeIn's central server to get the actual IPs of other computers in the network and establishes P2P connections. I do have Hamachi on my servers, but it only assigns one IPv4 and one IPv6 per machine, which isn't enough for Docker networking. Plus, each network only allows 5 computers to connect for free—beyond that requires payment.
So far, my requirements are:
- Any single server failure shouldn't affect others
- Need a unified management panel for quick server addition/removal
- Don't need Docker's DNS resolution features
- Each server should get multiple IPv4/IPv6 addresses (can be internal ULA ranges), preferably with an internal subnet
After some research, I chose ZeroTier One. It's similar to Hamachi but has these advantages:
- I can specify which IPv4 subnets are routed through ZeroTier and freely set address pools.
- Each computer can get a /80 subnet under IPv6 ULA, sufficient for Docker.
- Free for up to 100 devices per user.
The first point is crucial. For example, I can set automatic IP assignment within 172.27.0.0/16 for each computer, while centrally routing 172.28.0.0/24 to one Docker server, 172.28.1.0/24 to another, and so on.
Installation and Configuration
ZeroTier One provides a one-click install script. Run this command on your server:
curl -s 'https://pgp.mit.edu/pks/lookup?op=get&search=0x1657198823E52A61' | gpg --import && \ if z=$(curl -s 'https://install.zerotier.com/' | gpg); then echo "$z" | sudo bash; fiThen register an account on ZeroTier One's official site. This requires a phone number. I tested with a China Telecom number—it received the verification SMS after 7 hours... I eventually used a Google Voice number.
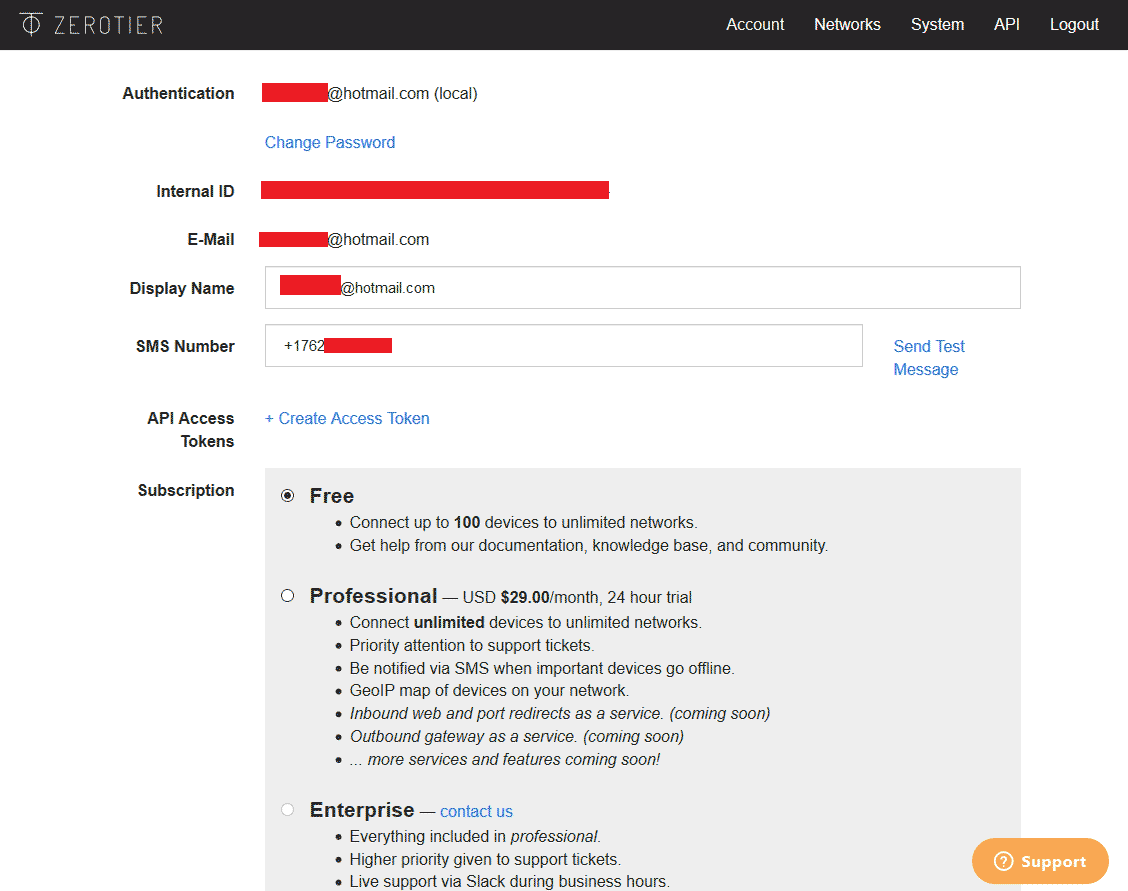
After registering and logging in, you'll see this interface:
Click "Network" at the top, then "Create New Network". You'll see a new network in the list:

The second one in the image is my existing network; the first is newly created. Click into it.
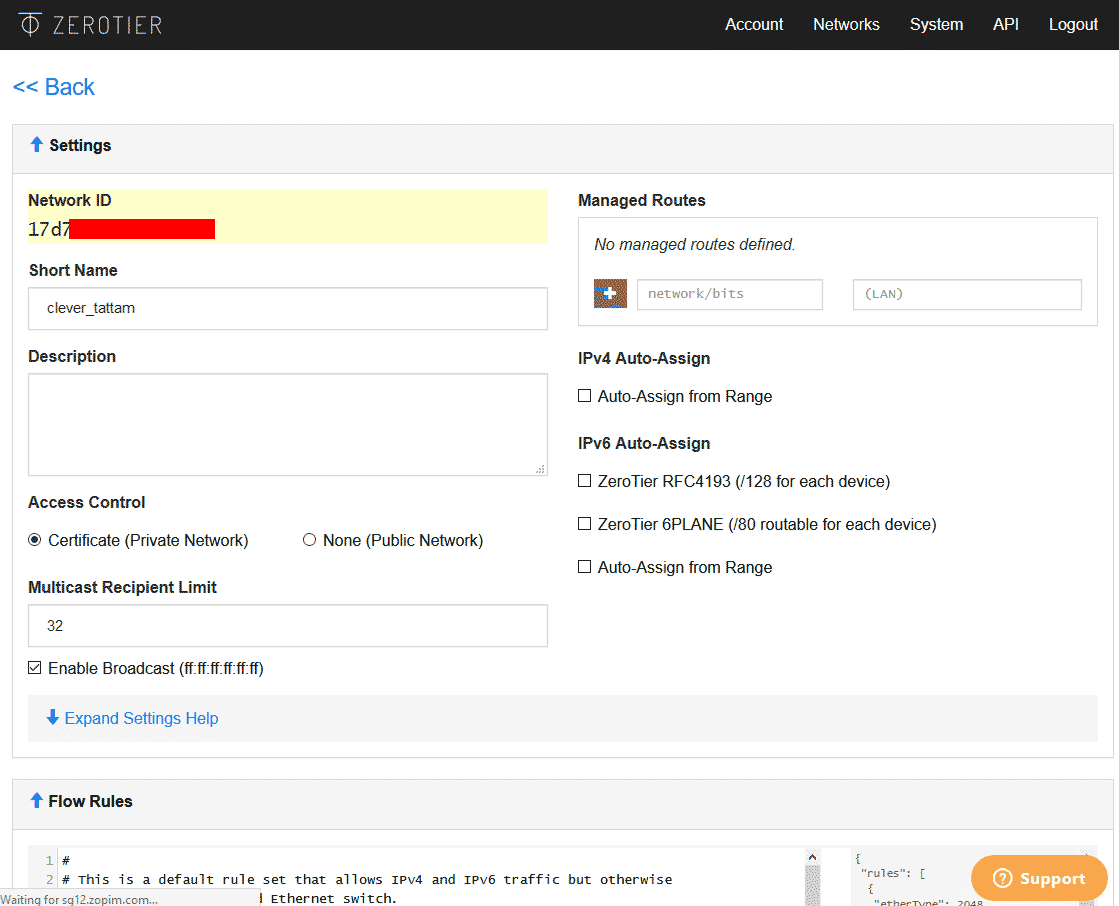
The top-left shows the Network ID—you'll need this for your ZeroTier client later.
Short Name is the network name—customize it for easier identification.
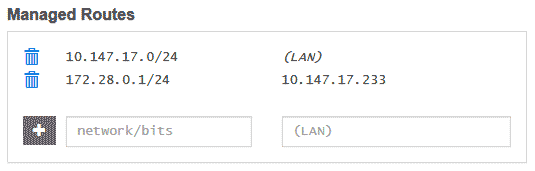
Managed Routes (top-right) is for routing table settings—we'll modify this later.
IPv4 Auto-Assign handles automatic IPv4 address assignment—we need to enable this.
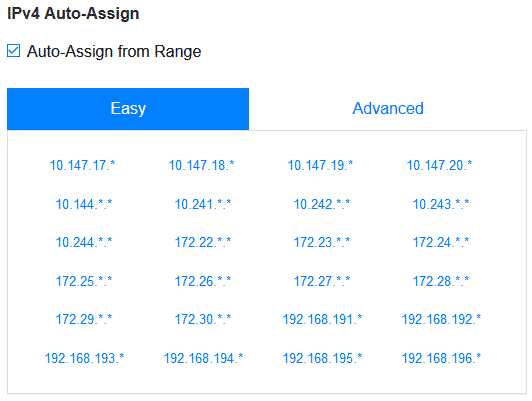
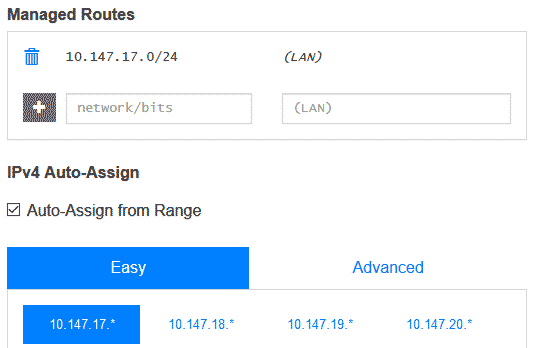
After enabling, choose a subnet that doesn't conflict with your server's existing subnets. For example, if a NAT VPS uses 172.17.0.0/16, don't select it to avoid network outages. After selection, routing table settings are automatically added:
IPv6 Auto-Assign handles IPv6 assignment with two options:
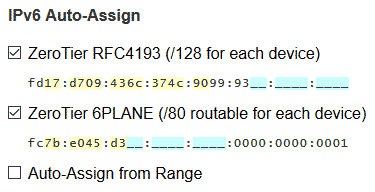
The RFC4193 option generates a random ULA subnet (under fd00::/8), assigning one IPv6 (/128) per server. 6PLANE uses another ULA subnet (fc00::/8), assigning a /80 subnet per server. For Docker networking, we need the 6PLANE subnet.
Next, add servers to the network. Run this command on your server:
zerotier-cli join [Network ID]Then check the "Auth" box for the corresponding server in the settings page:

The page will display the server's assigned IPv4 and IPv6 addresses, and servers can now ping each other.
Configuring Docker - Native Docker
In this example, assume a Docker server is assigned 10.147.17.233 and fc23:3333:3333:3333:3333::1/80. We want to add 172.28.233.x/24 for its use. OS environment is Debian 8.
We need to specify Docker startup parameters. On systemd distributions like Debian 8, modify systemd configuration:
cd /etc/systemd/system
mkdir docker.service.d
cd docker.service.d
nano docker.conf
Enter this content in docker.conf:
[Service]
EnvironmentFile=-/etc/default/docker
ExecStart=
ExecStart=/usr/bin/dockerd -H fd:// $DOCKER_OPTS
Save with Ctrl+X, Y, Enter. Then run:
systemctl daemon-reload
cd /etc/default
nano docker
Modify the DOCKER_OPTS line to:
DOCKER_OPTS="--fixed-cidr=172.28.233.0/24 --ipv6 --fixed-cidr-v6=fc23:3333:3333:3333:3333::/80"Restart Docker:
service docker restartNow your Docker containers will have IPs in these two subnets.
New problem: Containers get ULA subnets and can't access public IPv6. Solution: Use docker-ipv6nat. This container automatically configures IPv6 NAT based on your container settings, similar to Docker's IPv4 NAT.
Why use IPv6 NAT? Advantages:
- Some providers only give one IPv6 address
- Easier firewall configuration (external can't directly access containers)
- Operates on ULA subnets—perfect for this scenario
Launch the container:
docker run -d --restart=always -v /var/run/docker.sock:/var/run/docker.sock:ro --privileged --net=host robbertkl/ipv6natYou may need to restart other containers for changes to take effect. Now your containers can access public IPv6.
Optionally, add --userland-proxy=false to DOCKER_OPTS to disable Docker's userland proxy and save memory.
Configuring Docker - Compose
With Docker-Compose, things are simpler—no need to modify systemd. Update your docker-compose.yml:
version: "2.1"
services:
  docker-ipv6nat:
    image: robbertkl/ipv6nat
    container_name: docker-ipv6nat
    restart: always
    privileged: true
    network_mode: host
    volumes:
      - "/var/run/docker.sock:/var/run/docker.sock:ro"

  your-original-container:
    [...]
    depends_on:
      - docker-ipv6nat

  [your-other-containers...]

networks:
  default:
    driver: bridge
    enable_ipv6: true
    ipam:
      driver: default
      config:
      - subnet: 172.28.233.0/24
        gateway: 172.28.233.1
      - subnet: fc23:3333:3333:3333:3333::/80
        gateway: fc23:3333:3333:3333:3333::1
Add dependency on docker-ipv6nat for each original container. Then run docker-compose up -d.
Configuring System Forwarding
Add to /etc/sysctl.conf:
net.ipv4.ip_forward = 1
net.ipv6.conf.default.forwarding=1
net.ipv6.conf.all.forwarding=1
net.ipv6.conf.all.proxy_ndp=1
Run sysctl -p to enable. Configure firewall rules for these subnets if needed.
Configuring ZeroTier Routing Table
In Managed Routes, add "172.28.233.1/24, 10.147.17.233" to route all 172.28.233.1/24 traffic to 10.147.17.233.
Now you can ping Docker containers on 10.147.17.233 from other servers. Repeat on all servers (ensure IP ranges don't overlap) to establish a dual-stack LAN across all Docker servers and containers.